Last updated: October 20, 2026
Quick Answer: The best Biology Homeschool Kits: What to Look for Before You Buy are the ones that match the student’s age, your supervision level, and the amount of hands-on biology you want to teach, usually with a real microscope, clear unit list, and enough materials to cover the topic without extra shopping. A good biology homeschool kit should give you enough microscope work, model-building, and anatomy coverage to teach real biology without forcing you to source half the lesson yourself. If the kit skips a microscope, offers only paper diagrams, or treats dissection like an afterthought, it will feel thin fast; if you are unsure about safety or specimen handling, consult a qualified science educator or lab professional and check current guidance from the National Science Teaching Association and the National Association of Biology Teachers.
Key takeaways
- Choose a biology homeschool kit around the biology topics you actually want to teach: cells, heredity, anatomy, ecology, or microscopy.
- A real microscope matters more than a pile of novelty activities; 40x to 400x is usually the useful middle ground for homeschool use, and you can confirm what fits your student with guidance from the National Science Teaching Association and microscope basics from the University of Utah’s Genetic Science Learning Center.
- Cell models and anatomy pieces should do more than decorate the box; they should support labeling, comparison, and repeated use.
- Dissection alternatives can work well, especially for younger students or families who want to avoid specimens, but they should still teach structure and function clearly.
- Age fit is not just about reading level; it is about hand strength, attention span, and how much supervision the kit needs.
- A strong biology homeschool kit is not always the most crowded kit. It is the one that matches your child’s stage and your teaching time.
What should a biology homeschool kit actually cover?
A biology homeschool kit should cover the living-systems topics that make sense for the student’s age, not just a random mix of craft projects. At minimum, I would want to see cells, basic classification, anatomy, and some microscope work in one box or bundle.
For younger learners, that might mean a few core ideas: plant versus animal cells, the parts of the human body, life cycles, and simple observation. For middle school, the kit should move into organ systems, microscope slides, and a stronger cell unit. By high school, the kit needs enough depth to support topics like heredity, tissues, genetics basics, and more detailed anatomy.
The first thing to check is whether the kit has a real scope or just a theme. A box full of “fun science” materials can still miss the actual biology. If you are teaching a full year, the kit should map to at least 8 to 12 weeks of genuine content, not one afternoon of activities stretched into a unit.
Look for a table of contents or unit list that names the topics plainly. “Living things,” “cells,” “human body,” and “microscopy” are useful. Vague labels like “nature studies” leave too much to guesswork. A solid biology kit should also show where the work happens: workbook pages, lab sheets, model activities, or slide observation. If the only instruction is “read and discuss,” you are buying a reading package, not a biology kit.
I would also want to see whether the kit is designed around one grade band, such as grades 3–5 or 7–9. A broad label like “all ages” often means the science has been flattened. For a quick comparison of related options, the homeschool science kits page can help you narrow the field before you choose a biology-specific set.
Which microscope features are worth paying attention to?
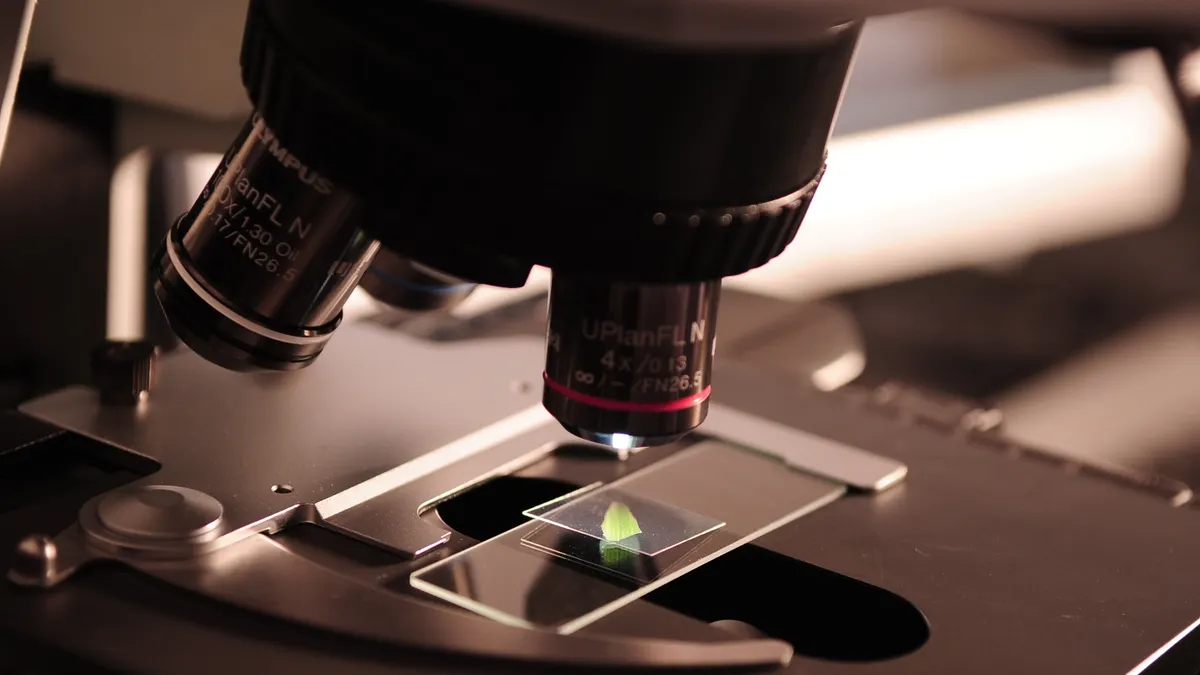
A biology homeschool kit is only as strong as its microscope if the microscope is flimsy or underpowered. For most homeschool biology, a compound microscope with 40x to 400x magnification is the practical target, because that range lets students see prepared slides, cell structures, and many common specimens without chasing extremes they will not use often. If you are unsure what magnification is appropriate, consult a science teacher or lab professional and compare the kit against microscope guidance from the National Center for Biotechnology Information and the University of Utah’s Genetic Science Learning Center.
Do not get distracted by giant magnification numbers on the box. A 1200x label looks impressive, but usable image quality matters more than the number. Poor optics at high magnification can turn a lesson into frustration. The useful question is whether the kit includes a stable microscope body, real lenses, a light source, and slide accessories that support repeated use.
Here is the core buying process I would use:
- Check the microscope type first, because biology work needs a compound microscope more often than a toy scope. Expect clear use on slides, not just surface viewing.
- Look at the magnification range, and treat 40x, 100x, and 400x as the practical range for most homeschool lessons, while checking with a qualified instructor if you are buying for a younger child or for lab-style use. Expect to see cells, onion skin, pond life, or prepared tissue slides more clearly in that band.
- Inspect the light source and stage, because a built-in LED and a steady slide platform make lessons smoother. Expect less squinting and fewer failed observations.
- Check whether the kit includes prepared slides, blank slides, coverslips, droppers, and staining tools. Expect to start observing on day one instead of shopping for basics later.
- Confirm the adjustment controls feel simple enough for the student’s age. Expect a middle-school student to manage coarse focus more easily than a younger child.
A good microscope section in the kit should also tell you how many slides are included and whether they are prepared or blank. Prepared slides help a new student see results quickly. Blank slides let an older student practice specimen prep, which is a different skill and a useful one.
The trade-off is price versus durability. A cheap microscope bundle can still be fine for an elementary introduction, but if you want a year of biology and multiple students using it, a sturdier setup is worth more than extra plastic accessories. This is the part of the kit where “more stuff” often beats “more promises,” and it is one reason the biology homeschool kits category is worth comparing carefully before you buy.
How do cell models and anatomy pieces help a biology kit?

Cell models and anatomy pieces help when they make structures easier to compare, label, and remember, not when they only look pretty on the shelf. A cell model should show the parts clearly enough that a student can identify the nucleus, membrane, cytoplasm, and other major structures without guessing.
A flat diagram is useful, but a 3D cell model gives a different kind of learning. It helps the student see relative size, placement, and how parts fit together. That matters in biology homeschool kits because cells are abstract until a child can point to them. If the kit includes both plant and animal cell models, even better, because comparison is where the lesson becomes biology instead of memorization. For a broader look at how models support science learning, the National Science Teaching Association has useful classroom guidance.
The same rule applies to anatomy. A human torso model, skeleton pieces, organ overlays, or anatomy cards should support specific learning goals. A kit for grades 4–6 might only need broad organ recognition. A kit for older students should go further and connect structure to function: lungs for gas exchange, the heart for circulation, muscles for movement, and bones for support.
Watch for anatomy material that is too generic. If the kit says “human body” but only includes a coloring page and a label sheet, it is not really teaching anatomy. A better biology homeschool kit uses repeated labeling, matching, and comparison across systems. That is what helps a student retain the material after the worksheet is done.
There is a practical limit here. Small plastic models can be excellent for overview learning, but they rarely give enough detail for advanced anatomy. If you want high school depth, you may need a kit that pairs models with diagrams, readings, or dissection work. The model alone will not carry the whole subject, so it is worth checking whether the kit links the model to the rest of the biology homeschool kits lesson plan.
Should the kit include dissection or dissection alternatives?
Yes, but the best choice depends on the student’s age, your comfort level, and how much hands-on biology you want to do. Dissection can be a strong part of a biology homeschool kit because it turns anatomy into something the student can observe directly instead of only reading about.
For many families, though, dissection is not the right starting point. Younger students may be uncomfortable with specimens, cleanup, or sharp tools. In that case, a good alternative is a kit with detailed anatomy models, virtual dissection resources, or preserved demonstration materials that do not require a full cutting lab.
If the kit includes dissection, check for more than the specimen itself. You want tools, a tray, gloves, instructions, and safety guidance that match the student’s level. A proper dissection unit should also explain what the student is supposed to learn from the exercise. Cutting something open without a goal is just mess.
Dissection alternatives should still be specific. A virtual lab, a model with removable organs, or labeled cross-sections can teach organ placement and function well. What they do not replace is the tactile experience of identifying tissues and structures in a specimen. That is the main trade-off, and it is why many biology homeschool kits describe this choice separately.
A good rule: if the kit is for elementary grades, dissection should be optional rather than central. If the kit is for middle or high school, it should at least acknowledge dissection alternatives so you are not trapped into a format you do not want. For background on specimen handling and classroom expectations, consult a qualified instructor before you buy.
How do you judge age suitability without getting fooled by the label?
Age suitability is about independence, not just reading level, and that is where many biology homeschool kits miss the mark. A kit labeled for ages 8 to 12 may still be too fiddly if it expects careful microscope handling, detailed labeling, and a long attention span.
Start by matching the kit to three things: motor skills, reading load, and supervision needs. A child who struggles with small parts will have a hard time with slides, probes, and model assembly even if the science itself is age-appropriate. A student who reads well may still need help with science vocabulary such as membrane, organelle, or circulation.
Also check how much teacher guidance the kit assumes. Some kits provide a complete lesson plan and take 30 to 45 minutes per session. Others assume the adult will explain every step. That is a big difference if you are juggling several children. If the kit says it is a “self-directed” middle school course but uses microscope work and specimen prep, treat that claim cautiously.
A useful test is simple: can the student complete one lesson in about 20 to 30 minutes with the supplies in the box and only light adult help? If not, the kit may still be good, but it is not a low-prep solution.
The age mismatch that causes the most regret is buying too advanced a biology kit because it looks impressive. You end up with a microscope that sits unused, a stack of terms the student cannot absorb, and a parent doing all the real work. A smaller, cleaner kit that gets used weekly is usually the better buy, especially when you want biology homeschool kits that match what the student can actually do.
What should you check before you place the order?
You should check the kit’s parts list, topic list, and teaching load before you buy, because those three things determine whether the box supports a real biology year or just a short detour. A strong kit usually spells out exactly what is included: microscope, slides, cell model, anatomy resources, dissection materials, and lesson guides.
Read the contents line by line. If the kit promises a microscope but does not say whether slides are included, assume you will need to buy them separately. If it mentions anatomy but not which body systems are covered, assume the coverage may be thin. If it includes dissection, look for tool quality and cleanup supplies, not just the specimen.
Two authoritative places can help you sanity-check the science level and the terminology you are seeing. The National Science Teaching Association has resources on science content and classroom practice, and the National Association of Biology Teachers publishes guidance and teaching ideas for biology instruction. Those organizations are useful when you want to judge whether a kit is teaching actual biology or just packaging it well.
One last point: biology kits are not all meant to do the same job. A kit built around a microscope and slides is a better fit for observation-heavy learning. A kit built around a cell model and anatomy pieces is better for younger or more visual learners. A kit with dissection is better for older students who can handle more detail. The right purchase is the one that matches your child’s stage and your time, not the one with the longest supply list.
If you want the broader category first, the homeschool science kits hub belongs before this decision, but this page is the one to use when biology is the subject you need to get right.
Drafted with AI; not yet reviewed by a person.